
Awaken Your Loaf: The Foolproof Sourdough Starter Recipe for Artisan Bread
Embarking on the journey of homemade sourdough bread begins with a single, vital step: creating your own active sourdough starter. This guide presents the “Awaken Your Loaf: The Stress-Free Foolproof Sourdough Starter” recipe, meticulously designed to demystify the process and empower you to cultivate a vibrant, robust wild yeast culture right in your kitchen. Forget the intimidation often associated with sourdough; our foolproof sourdough starter recipe turns simple flour and water into the “mother” of all your future tangy, chewy, artisanal loaves. Get ready to awaken your inner baker and unlock a world of unparalleled flavor and texture.
Why you’ll love this Awaken Your Loaf: The Stress-Free Foolproof Sourdough Starter
This isn’t just a recipe; it’s an invitation to a rewarding culinary adventure. You’ll love this particular foolproof sourdough starter recipe because it strips away complexity, offering a clear, step-by-step path to success. The satisfaction of watching your starter bubble and thrive, knowing it will soon leaven your very own bread, is immense. It’s an accessible entry point into the world of artisan baking, requiring minimal hands-on time and only a few basic ingredients. Plus, nurturing your own starter is incredibly rewarding, creating a living culture that can be passed down through generations of bakers. It’s a mindful daily ritual that connects you to the ancient art of bread making.
Ingredients & Substitutions

The beauty of a sourdough starter lies in its simplicity. You only need a few humble components, but their quality matters.
- 50g unbleached all-purpose flour (or bread flour): Unbleached flour is crucial as it retains more natural enzymes and microbes essential for kickstarting your starter. While all-purpose works well, bread flour, with its higher protein content, can sometimes lead to a stronger, more vigorous starter. Avoid bleached flour, as the bleaching process can inhibit yeast activity.
- 50g warm filtered water (around 75-80°F / 24-27°C): Filtered water is non-negotiable. Chlorine in tap water can kill or inhibit the delicate wild yeasts and bacteria we’re trying to cultivate. The warm temperature helps to activate the yeast without being too hot to harm it.
- Additional flour and water for daily feedings: As your starter grows, it will need consistent nourishment. Ensure you have a good supply of your chosen unbleached flour and filtered water on hand.
For equipment, you’ll need a clean glass jar (at least 1-quart capacity), a non-metal spoon or spatula for mixing, and a loose-fitting lid or plastic wrap for covering.
How to make Awaken Your Loaf: The Stress-Free Foolproof Sourdough Starter
Patience and consistency are your best allies in creating a thriving starter. Follow these daily steps to cultivate your “mother.”
- Day 1: The First Mix
In your clean glass jar, combine 50g of unbleached flour and 50g of warm filtered water. Mix thoroughly with a non-metal spoon or spatula until no dry clumps of flour remain. The mixture should have a consistency akin to thick pancake batter. Cover the jar loosely with a lid or plastic wrap, ensuring some air exchange is possible. Place it at room temperature, ideally between 70-75°F (21-24°C), and let it rest for 24 hours. - Day 2: First Feeding
Observe your starter. You might see small bubbles or little to no activity. Regardless of appearance, it’s time for the first feeding. Discard about half of your starter (approximately 50g). To the remaining starter, add 50g fresh unbleached flour and 50g warm filtered water. Mix well, cover loosely, and return it to room temperature for another 24 hours. - Days 3-7 (or until active): Daily Ritual
Continue the daily feeding process:- Discard half of the starter (about 50g).
- Feed the remaining starter with 50g fresh unbleached flour and 50g warm filtered water.
- Mix thoroughly, cover loosely, and let it sit at room temperature for 24 hours.
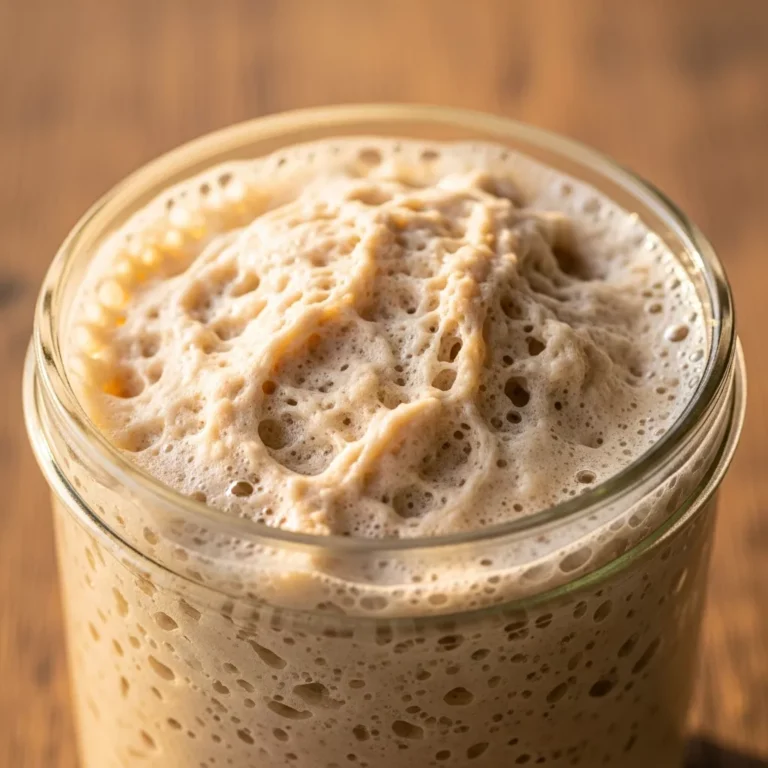
During these days, you should start noticing more consistent signs of life. Look for bubbles forming throughout the mixture, a pleasant tangy aroma developing, and the starter rising and falling predictably in its jar after feeding. Don’t be discouraged if it takes longer than 7 days; environmental factors and flour types can influence the timeline.
- Testing for Readiness: The Float Test
Your starter is ready for baking when it consistently doubles in size within 4-8 hours after feeding, is full of bubbles, and passes the crucial “float test.” To perform this test, gently drop a small spoonful of your active, recently fed starter into a glass of water. If it floats on the surface, congratulations! Your starter is vibrant and ready to leaven your first loaf.
Tips for Success
Cultivating a sourdough starter is more of an art than a science, but a few key practices will ensure your success.
- Temperature Control: Aim for a consistent room temperature between 70-75°F (21-24°C). This range is optimal for wild yeast activity. If your home is cooler, your starter might take longer to become active.
- Filtered Water is Key: Always use filtered water. The chlorine found in most tap water can inhibit or kill the beneficial microorganisms you are trying to cultivate.
- Patience, Patience, Patience: This is perhaps the most important tip. Sourdough starter development isn’t always linear. Some days you might see lots of activity, others less. Don’t give up! Consistency in feeding and a little patience will yield results.
- Watch for Mold: While a tangy, slightly sour, yeasty smell is normal and desirable, a foul odor or the appearance of fuzzy, colored spots (mold) means your starter has gone bad. If this happens, discard the entire batch and start anew with clean equipment.
- Weigh Your Ingredients: For accuracy, especially in baking, weighing flour and water is always recommended over volumetric measurements.
- Name Your Starter: This isn’t just a quirky suggestion; it helps foster a connection and encourages you to care for it. Many bakers find it a fun part of the process!
Using Your Active Starter
Once your starter is consistently active and passes the float test, a world of baking possibilities opens up! The primary use, of course, is to leaven your homemade sourdough bread, imparting that signature tangy flavor and incredible texture. But don’t forget about the “discard” – the portion of starter you remove before feeding. This isn’t waste; it’s a flavorful ingredient itself! You can use sourdough discard in a myriad of recipes that don’t rely on its leavening power, adding a delightful tang. For instance, you could whip up a batch of delicious Sourdough Discard Garlic Bread, transforming it into a crispy, flavorful accompaniment.
Maintaining Your Mother: Storage and Feeding Schedule
Proper maintenance ensures your starter remains healthy and ready for your next baking adventure.
- Storing in the Refrigerator: If you don’t plan to bake daily, storing your active starter in the refrigerator is an excellent way to slow its activity. This means less frequent feedings. To maintain a refrigerated starter, aim to feed it once a week:
- Take it out of the fridge and let it warm up for about an hour at room temperature.
- Discard all but about 50g of the starter.
- Feed it with 50g fresh flour and 50g warm filtered water.
- Let it sit at room temperature for 4-8 hours until it shows signs of activity (bubbles, rise).
- Once active, return it to the refrigerator.
To bake with a refrigerated starter, take it out the day before, feed it, and let it become active at room temperature before use.
- Room Temperature Maintenance: If you bake frequently (every day or two), you can keep your starter at room temperature. In this scenario, it will need to be fed every 12-24 hours to keep it vigorous. Simply discard half and feed with fresh flour and water as described in the daily feeding process.
With a well-maintained starter, you’re always ready to bake. Imagine pulling a beautiful loaf of Turkey Pepperoni Sourdough Bread from your oven, all thanks to the vibrant culture you nurtured.
FAQ
Q: What if my starter isn’t bubbling after a few days?
A: Don’t panic! This is common. Several factors can influence activity, including ambient temperature and the specific microbial profile of your flour and environment. Ensure you’re using warm filtered water and maintaining a consistent room temperature. Continue with the daily feeding schedule. Sometimes, a starter just needs a bit more time and consistency to get going.
Q: Why do I have to discard half of the starter?
A: Discarding helps to manage the volume of your starter, preventing it from growing into an unmanageable amount. More importantly, it ensures there’s enough “food” (fresh flour) for the yeast and bacteria in the remaining starter. If you don’t discard, the starter would quickly consume all the nutrients and become sluggish or starve.
Q: Can I use whole wheat flour for my starter?
A: Yes, absolutely! Many bakers start with whole wheat flour because it contains more nutrients and wild yeasts, often resulting in a faster, more vigorous initial activation. You can then transition to all-purpose or bread flour, or maintain a whole wheat starter. Just be consistent with your chosen flour type.
Q: My starter has a weird smell. Is that normal?
A: A healthy active starter typically has a tangy, slightly sour, yeasty, or even fruity aroma. If your starter smells like nail polish remover, old cheese, or has a truly foul odor, it might be off. This often indicates it’s hungry or an undesirable bacterial culture has taken hold. Try feeding it more frequently or in larger ratios for a few days. If the smell persists or mold appears, it’s best to discard and restart.
Q: How long does a sourdough starter last?
A: A well-maintained sourdough starter can last indefinitely! With proper care and regular feedings, it can live for years, becoming stronger and more complex in flavor over time. Think of it as a living pet that just needs regular nourishment.
Conclusion
Creating your own sourdough starter, affectionately known as “the mother,” is a deeply rewarding culinary endeavor that opens the door to a world of artisan baking. This “Awaken Your Loaf: The Stress-Free Foolproof Sourdough Starter” recipe provides a clear, manageable path to cultivating a vibrant, active culture in your kitchen. With just a few simple ingredients, consistent care, and a dose of patience, you’ll soon have a thriving starter ready to transform your baking. Embrace the daily ritual, enjoy the process, and get ready to bake some of the most delicious, tangy, and satisfying bread you’ve ever tasted. Happy baking!
Awaken Your Loaf: The Stress-Free Foolproof Sourdough Starter
Embark on your journey to baking artisanal bread right from your kitchen with our guide to creating a vibrant, robust sourdough starter. This foolproof method demystifies the process, turning simple flour and water into a bubbling, active wild yeast culture ready to leaven your loaves. Forget the intimidation; discover the joy of nurturing your own starter, affectionately known as ‘the mother,’ and unlock a world of tangy, chewy, homemade sourdough bread. Patience is key, but the daily ritual of feeding and watching it grow is incredibly rewarding. Get ready to awaken your inner baker!
- Total Time: 5 minutes
- Yield: 1 active culture (ongoing) 1x
Ingredients
- 50g unbleached all-purpose flour (or bread flour)
- 50g warm filtered water (around 75-80°F / 24-27°C)
- Additional flour and water for daily feedings
Instructions
- Day 1: In a clean glass jar (at least 1-quart capacity), combine 50g unbleached flour and 50g warm filtered water. Mix thoroughly with a non-metal spoon or spatula until no dry clumps remain. The consistency should be like a thick pancake batter. Cover loosely with a lid or plastic wrap (allowing some air exchange) and let it sit at room temperature (ideally 70-75°F / 21-24°C) for 24 hours.
- Day 2: You might see small bubbles or no activity yet. Discard about half of your starter (around 50g). Feed the remaining starter with 50g fresh unbleached flour and 50g warm filtered water. Mix well, cover loosely, and return to room temperature for 24 hours.
- Days 3-7 (or until active): Repeat the feeding process daily: discard half the starter, then feed with 50g fresh flour and 50g warm filtered water. You should start seeing more consistent activity, like bubbles forming, a tangy aroma developing, and the starter rising and falling predictably. It might take longer than 7 days depending on your environment and flour.
- Testing for readiness: Your starter is ready when it consistently doubles in size within 4-8 hours after feeding, is full of bubbles, and passes the 'float test.' To perform the float test, drop a small spoonful of starter into a glass of water; if it floats, it's ready to bake with!
- Maintenance: Once active, you can store your starter in the refrigerator to slow its activity if you don't bake daily. Feed it once a week: take it out, let it warm up for an hour, discard all but 50g, feed it 50g flour and 50g water, let it sit at room temperature for 4-8 hours until active, then return to the fridge. If baking frequently, keep it at room temperature and feed it every 12-24 hours.
Notes
Use filtered water to avoid chlorine which can inhibit yeast activity. Consistency is key for temperature and feeding schedule. Don’t be discouraged if it takes a few extra days to become active; wild yeast cultures thrive with patience. If you see any mold (fuzzy, colored spots), discard the entire starter and begin anew. A tangy, slightly sour smell is normal; a foul odor is not. Feel free to name your starter – it’s part of the fun!
- Prep Time: 5 minutes
- Cook Time: 0 minutes
- Category: Baking Foundation
- Method: Fermentation
- Cuisine: Artisan Baking
Nutrition
- Serving Size: 50g active starter (approximate)
- Calories: 95
- Sugar: 0g
- Sodium: 0mg
- Fat: 0g
- Saturated Fat: 0g
- Unsaturated Fat: 0g
- Trans Fat: 0g
- Carbohydrates: 18g
- Fiber: 1g
- Protein: 3g
- Cholesterol: 0mg